How to Style DorasmithOfficialMerch Outfits
Learn how to style DorasmithOfficialMerch outfits with expert tips on fit, layering, and proportions for every body type and season.
In this article
- Rethinking the Oversized Merch Default
- Choose volume with a purpose
- Mastering the Measure and Build Workflow
- Measure before choosing the silhouette
- Build around one graphic anchor
- Stress-test the outfit in motion
- Strategic Layering for Visual and Thermal Balance
- Give each layer a job
- Protect the graphic from visual overload
- Proportion Rules for Diverse Body Types
- Adjust the hem before changing the whole outfit
- Use contrast to balance volume
- Adapting Outfits for Comfort and Accessibility
- Build around low-friction pieces
- Check the seated view
- Make the outfit easy to repeat
- Seasonal Outfit Formulas and Footwear Pairings
- Warm-weather formula
- Transitional formula
- Cold-weather formula
- Quick answers to common styling problems
The most popular advice for wearing artist merchandise is also the least useful: buy the shirt several sizes too large, add baggy jeans, and finish with sneakers. That formula can work, but only when the volume, hem, shoulder line, and graphic placement are deliberate. Sizing up often creates dropped shoulders, excessive sleeve length, and a torso that collapses under its own fabric.
Good graphic-merch styling starts with the same discipline used for any strong outfit. Fit controls how the print reads, proportion controls the silhouette, and comfort determines whether you'll wear the look again. The aim isn't to hide your body inside an oversized garment. It's to choose the right amount of ease, then build the rest of the outfit around it.
Rethinking the Oversized Merch Default
An oversized DorasmithOfficialMerch shirt should look intentionally relaxed, not like a regular shirt bought in the wrong size. Those outcomes are different. An intentional oversized cut usually has considered shoulder placement, sleeve volume, body length, and enough structure to let the graphic sit cleanly. A shirt that is just too large can pull the print off center, bunch at the hem, and make the entire outfit appear unfinished.
The first distinction is between garment design and size escalation. A deliberately oversized tee may be broad through the chest while keeping its length controlled. A larger version of a standard cut may add unwanted length everywhere, causing the shirt to overwhelm a shorter torso or disappear beneath an open jacket. It can also make the sleeves extend too far down the arm, which changes the visual balance of the graphic.
Fit matters beyond appearance. A 2025 survey of 6,000 global consumers found that 61% returned apparel because it didn't fit, while the same source identifies size and fit as the leading reason for online clothing returns. That makes measurement a practical styling tool, not a technical detail reserved for shoppers between sizes.
Choose volume with a purpose
Start by deciding what you want the garment to do.
- Relaxed focal layer: Keep the shirt loose through the chest, then pair it with straight-leg or tapered trousers. This preserves a casual mood without creating volume from head to toe.
- Closer graphic top: Choose a more controlled fit and let wider-leg jeans, cargo trousers, or a skirt provide contrast below.
- Longer base layer: Use the hem as a visible design line beneath a cropped jacket or overshirt, but keep the outer layer structured enough to prevent stacking from becoming bulky.
The key question isn't, “What size creates the biggest look?” Ask instead, “Where should the volume sit?” A broad top with restrained bottoms reads intentional. A broad top with equally broad trousers can work, but it needs a clear visual break, such as a tucked hem, a defined waistband, a shorter jacket, or a contrasting shoe.
Practical rule: Oversized should describe the silhouette you selected, not the mistake you made at checkout.
Treat the printed piece as a serious fashion element. Neutral denim, black trousers, stone chinos, and uncomplicated skirts create space around the artwork. If the graphic contains a distinctive accent color, repeat that color once in footwear, a cap, or a bag. Repeating every color from the print usually makes the outfit look coordinated in a forced way.
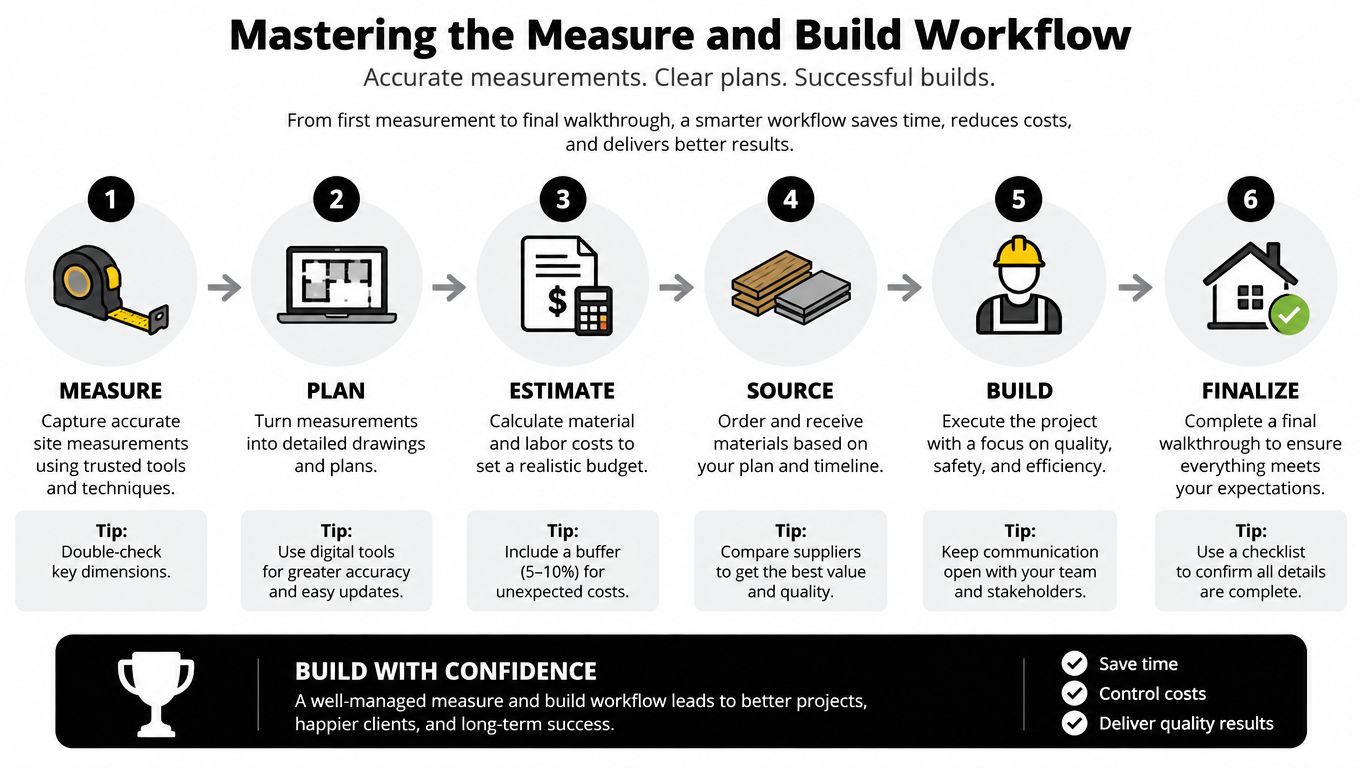
Mastering the Measure and Build Workflow
A size label is a starting point, not a styling specification. Clothing-size systems use selected body measurements, while finished garments include ease, design allowances, and cut-specific shaping. The same label can therefore fit differently across brands, markets, and silhouettes. For the underlying relationship between body data and garment sizing, see this overview of garment-sizing systems and anthropometric foundations.
Use a repeatable sequence: measure, build, then stress-test.
Measure before choosing the silhouette
Record your chest or bust, waist, and hip measurements, then compare them with the garment's size chart. For a tee, hoodie, or sweatshirt, inspect shoulder width, chest width, sleeve length, and total length. For trousers or skirts, check the waist, hip, rise, inseam, and intended ease. These details determine whether the graphic sits cleanly or twists, pulls, and folds.
This measurement-first method follows NIST's apparel fit guidance, which covers body-dimension definitions, measurement methods, population groups, and sizing standards. Height helps predict garment length, but it cannot show whether a shirt will pull across the chest or sit correctly at the shoulders.
If your upper and lower measurements point to different sizes, retain the larger measurement where movement requires it, then refine the silhouette through cut and layering. Decide whether the garment should follow the body, skim it, or create deliberate space. That choice produces a more reliable outfit than treating a size label as a fixed identity.
Build around one graphic anchor
Choose one DorasmithOfficialMerch tee, hoodie, or sweatshirt as the main visual point. Keep nearby garments in low-contrast neutrals or a controlled analogous palette so the artwork stays readable. A black graphic tee can anchor washed denim, charcoal trousers, or olive cargo pants. A colorful sweatshirt usually works better with simpler bottoms and footwear.
A second logo should be small or positioned away from the main graphic. Competing marks make the outfit look crowded rather than layered. For more outfit ideas and merchandise context, browse the DorasmithOfficialMerch blog.
Stress-test the outfit in motion
Stand, sit, raise your arms, walk, and add the outer layer you expect to wear. Shoulder seams should rest near the shoulder edge, the torso should fall without diagonal pulling, and the hem should not bunch beneath a jacket or overshirt.
Take front, side, and seated photographs. A shirt may look balanced while standing yet become too long across the lap when seated. Check whether the print folds, rubs, or disappears during the positions you use throughout the day. Adjust the layer, hem, or graphic placement instead of accepting restricted movement as part of the look.
Strategic Layering for Visual and Thermal Balance
Layering graphic merchandise works best when you manage thermal load and visual load at the same time. Adding pieces without considering fabric weight can leave the shoulders stiff, the arms restricted, and the print hidden under a mound of fleece. A successful layered outfit has a clear anchor, visible depth, and enough room for movement.
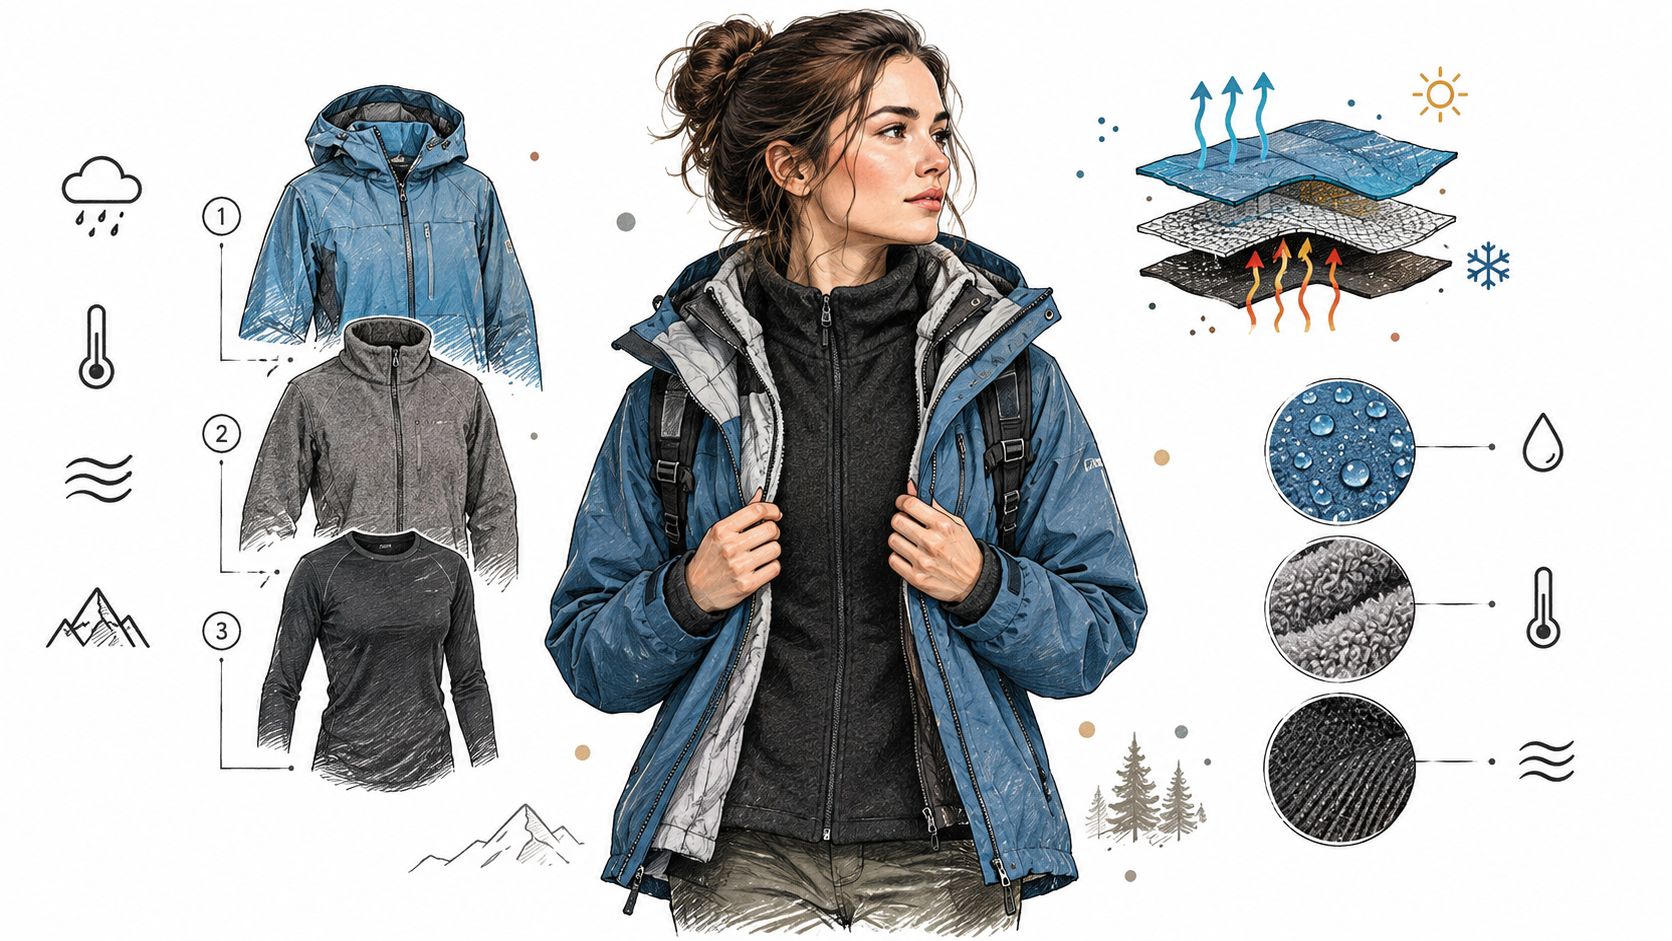
Begin with a breathable base layer when the weather or indoor temperature requires it. The branded tee or sweatshirt should then act as the visual anchor. Over it, choose an open overshirt, jacket, or coat with enough ease to avoid compressing the print and enough structure to keep the outline clean.
Laboratory research evaluating 12 inner and outer fabric combinations found that layering generally increased thermal resistance and diffusion, while an air gap reduced differences in thermal resistance between combinations, as reported in this study of layered clothing materials. In practical terms, a little space between layers can improve both comfort and the appearance of the outfit.
Give each layer a job
A useful system looks like this:
- Base layer: Choose a lightweight, breathable fabric that reduces friction and doesn't create a thick ridge beneath the graphic.
- Branded anchor: Let the DorasmithOfficialMerch tee, hoodie, or sweatshirt carry the strongest visual message.
- Depth layer: Use an open flannel, overshirt, denim jacket, or lightweight utility jacket to frame the graphic.
- Weather layer: Add a coat only when it has enough room through the shoulders and arms to preserve movement.
Avoid stacking thick fleece over fleece unless the outer garment is specifically cut for it. A heavy cotton hoodie beneath a dense jacket can feel hot and restrictive faster than a lighter base with a structured outer layer. Fabric thickness, weight, cover factor, and porosity all affect thermal resistance, so the heaviest piece shouldn't automatically sit closest to the body.
Protect the graphic from visual overload
Keep the main design visible from the angle people will see. An open jacket can frame a chest print, while a closed high-neck coat may hide it entirely. If the artwork sits low on the shirt, choose a shorter outer layer or leave the front open. If the design is on the back, avoid a coat with a large competing panel or prominent branding.
Layering check: Remove one piece when the shoulders look swollen, your arms can't move freely, or the primary graphic is mostly concealed.
Balance volume below the waist as carefully as you do above it. A roomy hoodie can sit over straight-leg trousers, while a slimmer sweatshirt can work with wider jeans or a flowing skirt. One texture contrast, one dominant graphic, and one coherent footwear color are usually enough to make the layers feel considered.
Proportion Rules for Diverse Body Types
Graphic merch often comes in unisex or broadly graded blocks, but bodies don't share one proportion pattern. The same shirt can look cropped on a tall wearer, long on a petite wearer, close through the chest and loose at the hem on another person, or perfectly balanced without adjustment. Styling should respond to shoulder line, torso length, waist placement, hip shape, and personal ease preference, not gender assumptions.
A 2025 study based on 3D body scans from 677 women found that a support-vector-machine model predicted clothing size from measurements such as bust, waist, and hip with 89.66% accuracy, reinforcing the value of measurement-based selection in this apparel-sizing study. The result doesn't mean a formula can replace trying on clothing. It does show why a familiar letter size is a weak starting point when the garment's cut is uncertain.
Adjust the hem before changing the whole outfit
A shorter torso can benefit from a half-tuck or French tuck, especially when the shirt is relaxed but not extremely long. Tucking only the front creates a visible waist point while allowing the graphic to remain mostly exposed. A cropped jacket over a longer tee can produce a similar effect, provided the lower hem is intentional rather than bunched.
For a fuller midsection, an open overshirt creates vertical lines without requiring a close fit at the stomach. Choose a layer that falls cleanly from the shoulders, then pair it with a straight or gently tapered bottom. Avoid using excessive fabric at both the top and bottom, because the outfit can lose its shape.
Use contrast to balance volume
Petite wearers often benefit from a controlled shirt length and bottoms that don't pool heavily over the shoe. A smaller graphic or a cleaner tuck can keep the design from dominating the frame. The answer isn't always a fitted size. It may be a relaxed shirt with a shorter hem, a cropped outer layer, or a more defined shoe.
Tall wearers can usually support additional length, but long shirts still need an intentional relationship with the bottom half. A longer tee can work beneath a shorter overshirt, while a full-length hoodie may look more deliberate with straight trousers and substantial footwear.
Plus-size styling works through the same principles. Look for enough chest and hip room, inspect how the print sits across the body, and use open layers or clean vertical seams when you want more structure. A relaxed top can pair with fitted trousers, a column skirt, or straight denim. Oversized isn't automatically more inclusive if it adds unwanted sleeve length, shoulder drop, or torso volume.
For a gender-neutral wardrobe, focus on the desired outline. A broad tee over straight-leg trousers creates a clean, understated shape. A closer top with wide-leg denim creates stronger movement below. Proportion gives you more control than labels, and it lets the same graphic serve several different styling preferences.
Adapting Outfits for Comfort and Accessibility
A stylish merch outfit has to work in the positions and conditions of real life. Someone may spend much of the day seated, use a wheelchair or mobility aid, avoid scratchy textures, need easy closures, or prefer clothing that doesn't require repeated adjustment. These needs don't weaken the outfit. They determine which details deserve priority.
Recent adaptive-fashion research involving 102 disabled participants found that comfort and fit were the top purchase drivers for 87% of respondents, followed by functionality and practicality at 69%, according to this adaptive-fashion research summary. That hierarchy makes sense for graphic merchandise. If a stiff waistband, rough seam, or restrictive sleeve makes the garment difficult to wear, an attractive print won't rescue it.
Build around low-friction pieces
Start with a soft base and add the graphic layer only if the fabric feels comfortable against the skin. An easy-open overshirt, zip jacket, or snap-front layer can provide warmth without requiring a tight pullover. Elastic-waist trousers, wide-leg pants, and soft denim alternatives can preserve the relaxed character of a graphic tee while reducing pressure at the waist and hips.
Sensory-conscious styling often improves when you reduce unnecessary surfaces. Choose smooth accessories, avoid stacking several textured layers, and inspect neck bindings, inner labels, cuffs, and seams. A simple outfit with one graphic, one soft outer layer, and stable footwear can look more polished than a visually ambitious combination that creates constant irritation.
Check the seated view
A chest graphic may fold across the lap when seated, while a back graphic can disappear against a wheelchair backrest or outer layer. Test the outfit seated before wearing it for a full day. If visibility matters, choose a shirt with a graphic placed higher on the torso, wear an open outer layer, or add a cropped jacket that frames rather than covers the design.
Pay attention to hem behavior. A long tee can gather beneath the thighs, while a short top can ride up during movement. The right length depends on the wearer's seated posture, chair setup, and preferred coverage. Accessories and bags should also stay clear of wheels, transfers, and mobility aids.
Make the outfit easy to repeat
The most useful formula is often the least complicated: a soft graphic tee, open overshirt, elastic-waist trouser, and footwear that remains secure without creating pressure points. In colder conditions, replace the overshirt with a lightweight jacket that has enough arm ease for movement. In warm climates, use the tee alone with breathable bottoms and keep the secondary layer optional.
Comfort and accessibility can shape the visual identity of the outfit. Clean lines, controlled color, and visible graphics remain possible without rigid tailoring or complicated closures. The best styling choice is the one that lets the wearer move, sit, dress, and return to the outfit without treating comfort as an afterthought.
Seasonal Outfit Formulas and Footwear Pairings
Seasonal styling should change the garment's role, not erase its identity. The same graphic tee can stand alone with fitted shorts, work as an autumn mid-layer, or remain visible beneath a winter coat. Start with the measurements, choose one visual anchor, and control the surrounding volume so the outfit reads as deliberate rather than merely oversized.
Size labels are unreliable across markets, seasons, and manufacturers. Finished garments differ through ease, fabric weight, stretch, and construction, so read the garment measurements each time you move between a lightweight tee, heavyweight hoodie, and outerwear. The label is a starting point. The chest, shoulder, body length, and sleeve measurements determine the actual silhouette.
Warm-weather formula
Use a breathable graphic tee, well-cut shorts, and minimalist sneakers. A relaxed tee can work, but the shorts need a defined line through the leg so looseness does not spread across the entire outfit. If the shirt extends too far over the shorts, try a partial tuck or use a shorter evening layer instead of adding volume below.
Canvas sneakers, clean leather trainers, and simple low-profile shoes keep attention near the graphic. Repeat one small print detail in a cap or bag, then stop. Several loud accessories can compete with a large front design and make the outfit feel crowded.
Sensory comfort also affects the finish. Choose soft socks, smooth seams, and lightweight fabrics that do not trap heat. An open, breathable shirt can provide sun coverage or indoor warmth while leaving the main graphic visible.
Transitional formula
Pair a graphic tee with straight-leg denim, an open overshirt, and low-profile boots or sneakers. Checked flannel adds texture, while denim or utility overshirts provide structure. Keep the overshirt open when the artwork is the focal point, and check its hem in a mirror. A hem that cuts across the central image can make the graphic look accidentally divided.
A closer-fitting tee supports wider trousers or a fuller skirt because the lower half carries more volume. A relaxed tee usually works more cleanly with straight or tapered denim. This exchange creates contrast without relying on the oversized streetwear cliché.
For rainy or changeable weather, add a lightweight jacket over the overshirt only if the layers preserve arm movement. If the shoulders look padded or the sleeves stack heavily, remove the overshirt and place the jacket directly over the tee. That adjustment improves mobility and keeps the outline sharper.
Cold-weather formula
Start with a comfortable base layer, add a graphic sweatshirt or hoodie, and finish with a structured coat that leaves room through the shoulders. Straight trousers or substantial denim ground the larger upper layer. Boots with a clear sole or a sturdy trainer can balance the hoodie's visual weight without competing with its design.
A beanie may repeat a small color from the graphic, but it should not introduce another prominent logo. Keep the coat open indoors when possible, or choose an opening wide enough for the sweatshirt to remain visible. The graphic should still have a clear frame around it.
Heavyweight layers need a mobility check. If the hoodie already contains substantial fabric, choose a smoother, lighter base and avoid placing another thick fleece layer beneath the coat. Warmth should come from considered layers, not maximum bulk. A clean outline is easier to wear, sit in, and move through a full day.
Quick answers to common styling problems
What if I want the design but not an oversized silhouette? Choose the size whose chest and shoulder measurements produce the intended fit, then use relaxed bottoms for a casual mood. A closer tee with wide-leg jeans gives ease without making the top oversized.
How can I make a long shirt work on a shorter torso? Try a half-tuck, a cropped jacket, or a shorter open overshirt. Keep the footwear visually simple so the outfit does not break into too many competing horizontal lines.
Can I wear a hoodie with loose trousers? Yes. Add a visual break through a shorter jacket, visible waistband, tucked edge, or more structured shoe. These details give the eye a clear point between the upper and lower volumes.
How do I keep the graphic visible under a coat? Choose an open coat, a shorter jacket, or a graphic placed higher on the torso. Test the outfit seated as well as standing if you will spend extended time sitting, since the graphic and hem can shift with posture.
What is the easiest polished formula? Use one graphic top, neutral straight-leg bottoms, clean footwear, and one structured layer. Restrained supporting pieces leave the artwork in control.
The strongest approach to styling DorasmithOfficialMerch outfits is not a fixed uniform. It is a repeatable method: select the fit from measurements, decide where volume belongs, protect the graphic's visibility, and test the outfit in real movement and weather.
Explore the available graphic merchandise at dorasmithofficialmerch.com, then apply the measurement and proportion principles above to choose pieces that suit your preferred silhouette. Build each outfit around a clear graphic anchor, add only the layers you will genuinely wear, and treat comfort as part of the final styling decision.